Inflating your bike tire is a simple task that can be done with a few tools and a little know-how. By following these steps, you’ll be able to answer the question (how to inflate bike tire), keep your bike tires properly inflated, ensuring a smooth and safe ride.
To inflate a bike tire, use a bike pump with the appropriate valve, connect the pump to the valve, and pump air until you reach the recommended pressure indicated on the tire sidewall.
Gather the necessary tools
Before you begin, make sure you have the following tools on hand:
Bike pump
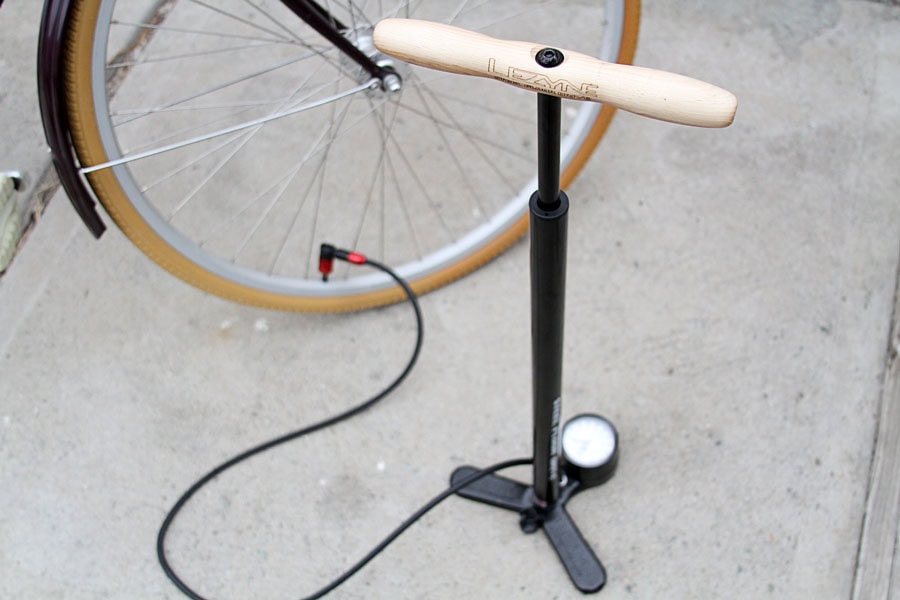
A bike pump is an essential tool for inflating your bike tire. There are different types of bike pumps available, including floor pumps, hand pumps, and CO2 inflators. Choose the one that suits your needs and make sure it is compatible with your bike’s valve.
Tire pressure gauge
A tire pressure gauge is used to measure the air pressure inside your bike tire. It is important to have the correct tire pressure for optimal performance and safety. A gauge with a pressure range suitable for your bike tire is recommended.
Locate the valve on the bike tire
There are two common types of valves found on bike tires:
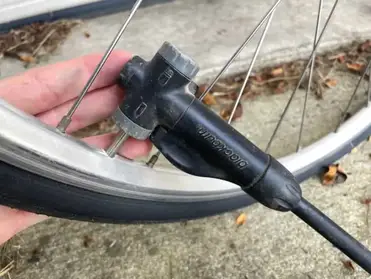
Presta valve
The Presta valve is a slender valve with a small nut at the top. To inflate a tire with a Presta valve, unscrew the nut and press it down to release any trapped air. Make sure the valve is in the open position before proceeding.
Schrader valve
The Schrader valve is similar to the valve found on car tires. It has a small pin in the center that needs to be depressed to release any trapped air. To inflate a tire with a Schrader valve, simply remove the valve cap and press down on the pin.

Here’s a comparison table outlining the differences between Presta valves and Schrader valves:
| Feature | Presta Valve | Schrader Valve |
|---|---|---|
| Origin | Europe | USA |
| Valve Type | Presta | Schrader |
| Valve Stem | Slim, with a locknut | Wider with built-in valve cap |
| Valve Mechanism | Opened and closed by unscrewing the top nut and pushing it down | Closed by a spring-loaded pin, opened by pressing the pin with a pump |
| Valve Pressure | Higher pressure applications; Common in road bikes | Lower pressure applications; Common in mountain bikes and cars |
| Pressure Limit | Can handle higher pressures; Suitable for road racing bikes | Typically lower pressure limit; Suitable for a wide range of applications |
| Use Cases | Road biking, performance cycling | Mountain biking, recreational cycling, automobiles |
| Pump Compatibility | Requires a pump with a Presta-compatible head or an adapter | Compatible with most standard pumps |
| Sealing | Requires a tighter seal due to the higher pressures | Seals well even with slight leakage; Ideal for tubeless systems |
| Valve Size | Available in standard and long lengths | Generally one size for all applications |
| Common Use | More prevalent in high-performance bicycles | More commonly found in a variety of bikes and vehicles |
| Puncture Risk | Less prone to accidental punctures due to the valve design | May be more prone to punctures due to the exposed valve core |
| Weight | Lighter due to the slender design | Heavier due to the robust construction |
| Adaptability | May require an adapter for certain pumps | Compatible with most pumps without additional adapters |
Both Presta and Schrader valves have their advantages and are suitable for different types of cycling and applications. Choose the valve type based on your bike and intended use.
Prepare the bike pump

Now that you have located the valve on your bike tire, it’s time to prepare the bike pump for inflation.
Attach the pump head to the valve
Depending on the type of pump you have, you may need to switch between different pump heads to fit the valve on your bike tire. Attach the appropriate pump head securely to the valve.
Secure the pump head tightly
To ensure a proper seal, make sure the pump head is securely attached to the valve. This will prevent any air from escaping during inflation.
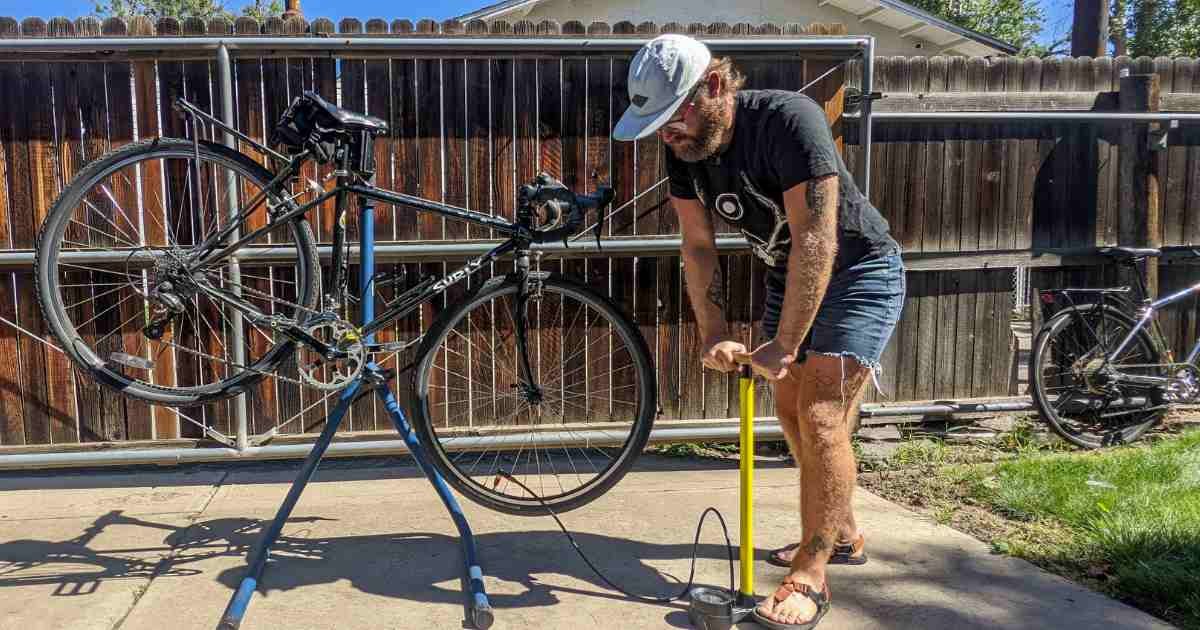
Inflate the bike tire
With the pump prepared, it’s time to inflate the bike tire.
Pump air into the tire
Using a smooth and controlled motion, pump air into the tire. Pay attention to the pressure gauge on your pump or use a separate tire pressure gauge to monitor the air pressure. Inflate the tire to the recommended pressure specified by the manufacturer.
Check the tire pressure with a gauge
After inflating the tire, double-check the pressure using a tire pressure gauge. This will ensure that the tire is properly inflated and ready for your ride.
Remove the pump head from the valve

Once you have reached the desired tire pressure, carefully remove the pump head from the valve. Be cautious not to let any air escape during this process.
Check the tire pressure again

After removing the pump head, check the tire pressure one final time to ensure it is within the recommended range. If necessary, make any adjustments using the pump.
Conclusion
Inflating your bike tire is a straightforward process that can be easily done with the right tools and knowledge. By following these steps, you can maintain the proper tire pressure for a smooth and safe ride. Remember to regularly check your tire pressure and inflate as needed to optimize your biking experience.
FAQ
Can I put air in my bike tires at a gas station?
Yes, most gas stations have air pumps available for customers to use to inflate their bike tires.
How do you pump a bike tire with a Presta valve?
Pumping a bike tire with a Presta valve is a straightforward process. Here’s a step-by-step guide to help you:
- Gather Your Equipment: Make sure you have a bike pump with a Presta valve adapter. Most pumps come with adapters for both Presta and Schrader valves.
- Prepare the Valve: Unscrew the small knurled nut on top of the Presta valve by turning it counterclockwise. This will release any air pressure in the tube and allow the pump to engage properly.
- Attach the Pump: Attach the pump’s Presta valve adapter securely onto the valve. Make sure it’s aligned and pushed down firmly.
- Secure the Adapter: If your pump has a lever, flip it to secure the adapter in place. This helps to create an airtight seal between the pump and the valve.
- Pump the Tire: Begin pumping the tire by moving the pump handle up and down. You’ll feel resistance as the air is being pumped into the tire.
- Monitor the Pressure: Keep an eye on the pressure gauge (if your pump has one) to ensure you’re inflating the tire to the desired pressure. Most bike tires have recommended pressure ranges printed on the sidewall.
- Check Pressure and Detach: Stop pumping when you reach the desired pressure. Carefully unscrew the Presta valve adapter from the valve, making sure not to lose any air. Screw the small knurled nut back down to close the valve.
- Replace Valve Cap: Put the small plastic or metal cap back onto the Presta valve to protect it from dirt and debris.
How do I know how much to inflate my bike tires?
Inflating your bike tires to the correct pressure is important for optimal performance, comfort, and safety. The recommended tire pressure can vary depending on factors like the type of bike, tire width, rider weight, and riding conditions. To determine the right tire pressure for your bike, follow these steps:
- Check the Sidewall: Look for the recommended pressure range printed on the sidewall of your bike tires. It might appear as PSI (pounds per square inch) or bar (metric pressure unit). There will usually be a minimum and maximum pressure indicated.
- Consider Your Weight: Heavier riders might need slightly higher tire pressures to support their weight and prevent pinch flats. Lighter riders can often use slightly lower pressures for a smoother ride.
- Consider Tire Width: Wider tires generally require lower pressures for better traction and comfort. Narrower tires can be inflated to higher pressures for lower rolling resistance.
- Riding Conditions: If you’re riding on rough or off-road terrain, slightly lower pressures can improve grip and cushioning. On smooth roads, higher pressures can reduce rolling resistance.
- Experiment and Fine-Tuning: Start with the recommended pressure on the tire sidewall, and then experiment by adjusting the pressure up or down by a few PSI. Test how the bike feels and how it performs in different conditions. Keep adjusting until you find the balance of comfort, traction, and efficiency that suits you.
- Use a Pressure Gauge: Invest in a reliable tire pressure gauge to accurately measure the pressure in your tires. Avoid using your fingers or eyes to estimate pressure, as it can be inaccurate.
- Regular Checks: Check your tire pressure before every ride, especially if the bike has been sitting for a while. Tire pressure can naturally decrease over time due to small air leaks.
- Front and Rear Tires: Note that front and rear tires might have different recommended pressures. Typically, the front tire can be inflated a few PSI lower than the rear tire for better steering control and comfort.
Originally posted 2023-08-07 16:10:48.